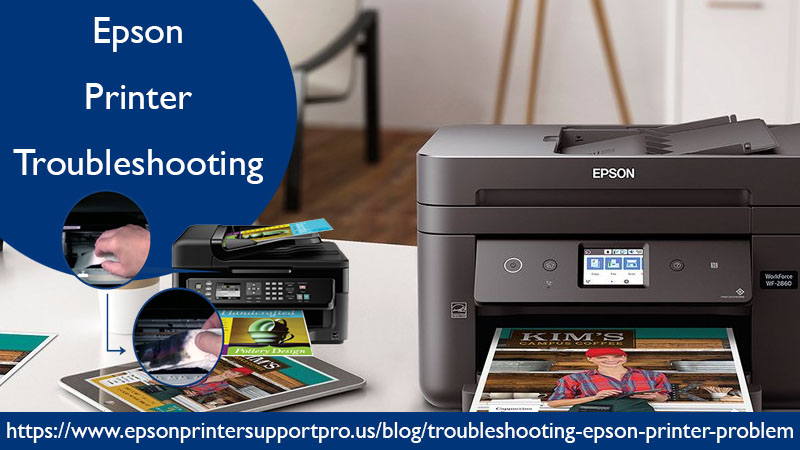
Epson Printer Troubleshooting Steps For Printing Not Working Issue
Looking for Epson Printer Troubleshooting steps to fix your Epson printer, not printing problem? You’ve come to the right place! In this blog, we have mentioned the checks and the solutions you need to follow in order to troubleshoot your Epson printer not printing issue. Continue reading to know more.

How To Fix Printer Not Printing Issue?
Sometimes, you may face an Epson printer not printing problem due to small causes like printer not switched on or connected to the PC. Before you start with the Epson Printer Troubleshooting, you should run these checks to fix any temporary issue with your Epson printer.
- Make sure your printer is switched on from the main source as well as the power button.
- Check the printer connection. If it is connected with the USB cable, check the cable is connected to the port properly as well as working fine. Replace the USB cable if required.
- Check the Ink cartridges. They should be installed properly.
- Make sure the papers are properly inserted in the tray.
- Check for any error signal on your printer machine.
- Check the Printhead
The Epson printer not printing problem also occurs when the printhead is dirty. The printhead gets clogged when you don’t use your Epson printer frequently. So, in order to bring your Epson printer back in the working state, you need to clean the printhead first. You can perform the printhead cleaning procedure using the in-built tool on your Epson printer.
H2> Epson Printer Troubleshooting Methods To Fix Printer Not Working Problem
Given below are the various Epson printer troubleshooting methods that can help you fix your Epson printer not printing issue easily. Follow each method one by one and make sure to check if the issue is resolved after trying each method.
1. Set Your Printer As Default
The first thing that you need to check and fix whenever you face any such issue is if your printer is set as default or not. You might encounter the printer not printing problem when your printer is not set as the default printer on your device. Set your printer as default from the printer’s menu and then try printing a document.
2. Check If Your Ink Cartridge Has Run Out Of Ink
Another possible reason that can cause the Epson printer to not work is when the ink cartridges are running low on ink. You should check the ink in the cartridges and if required refill them.
3. Install New Ink Cartridge
In case you haven’t changed the ink cartridges for a very long period then it might be your old cartridges causing the issue. Instead of refilling your old cartridge, replace them with the new cartridges this time to fix your printer not printing problem.
4. Update Printer Drivers
Most of the printing problems are caused due to outdated printer drivers. Besides, sometimes when you update your Windows operating system, the previous printer drivers might not be supported anymore. To fix this issue, you should try updating the drivers first, and if that doesn’t work you should install the latest printer drivers from the official Epson website manually.
5. Avoid Long Print Queue
Sometimes, when you are printing a lot of documents from your Epson printer, it stops working. Also, when sending a lot of printing requests at the same time it creates a long print queue that can prevent the Epson printer from working properly. The first thing that you should do in this case is clear the printing queue and then send printing requests slowly and steadily.
We hope you have successfully resolved your Epson printer not printing problem using this Epson printer troubleshooting methods mentioned above. In case the problem persists, we suggest you contact our Epson Printer Support experts and let them fix your Epson printer remotely.
What Are The Epson Printer Troubleshooting Steps?
Epson Printers are prominent among the users as it provides satisfying printing solution in their budget. Being technical device, it is also harsh truth that some problematic errors could appear while printing documents or anything. In order to efficiently deal with any kind of printer problems, it is highly required to get productive Epson Printer Troubleshooting guide. You land on right place as here we will walk you through all possible fixing procedures so you can get your problem in just a few second. Thus, stop being worried anymore, simply read the technical blog from top-to-toe carefully and perform the given instructions as well. Here you will get exact solutions for which you were wandering for. So, give a glimpse!
The Most Common Epson Printer Problems Usually Been Encountered Are:
- Printer Won’t Print Anything.
- Printer Ink Cartridge Issue.
- Epson Printer Driver Problem.
- Printer Prints Blank Pages.
- Paper Jamming Issue.
- Printer Prints Slowly.
- Printer Connection Problem.
Don’t feel blue! As no matter which of these Epson Printer problems you are experiencing there are quick-fixes available for all major and minor printer problems. In this guide, we have compiled some of the tested and tried Epson Printer Troubleshooting Steps through which you can proficiently solve your printer problem.
Comprehensive Epson Printer Troubleshooting Techniques
We have collected different Epson Printer problems along with suitable solutions. So, take a brief look at below noted information:
Problem 1: Epson Printer Won’t Print
Really, you are one of those users who have been using Epson Printer for print for several years. But, now what you notice that your printer has stopped serving quality printouts which makes you too much infuriating. However, printer sometime may not print any of your urgent documents due to several factors. Some of the possible causes for printer not printing problem are listed underneath. Check-out them:
- Printhead clogged problem prevents you from printing.
- Ink cartridge issue also leads you to face printer problem.
- Dry ink running in Epson Printer.
- Papers are jammed in the print queue.
- Epson Printer Drivers Out-of-date.
Troubleshooting Techniques For Epson Printer Won’t Print
Go through the following instructed lines accordingly to instantly get rid of printer not printing problem:
- First and foremost, you should check the USB cables that are taken to connect the Epson Printer to the computer system. USB cables should not be defective at any cost otherwise you won’t print anything from your Epson printer.
- Secondly, what you actually need to do is to turn-off your printer and thereafter you have to eject any USB connected to printer. Also you need to remove the cable connected to the power socket. Once it is done, wait for couple of minutes and then connect all the wires properly and turn your printer ON. Now, this time you will be allowed to print hassle-freely.
Problem 2: Epson Printer Network Problem
Network issue on Epson Printer is a very common though annoying problem that could occur from time to time. The printer connection problem can be frustrating, and need proficient Epson Printer Troubleshooting guide to eradicate it from the root. Beneath information will let you to fix this issue soon. So, start following the provided steps accordingly:
Troubleshooting Techniques For Epson Printer Network Problem
You are advisable to check your Epson printer wireless connection for its proper working. Here is what you have to perform for this:
- Make sure your wireless printer is working accurately by wireless connection to the computer or laptop.
- Make sure the printer is located within the range of your Wi-Fi router’s access point.
- Check the Wi-Fi lights for its turning ON.
- Remove Access Restriction from the router that blocks the connection to be setup.
- Check your Wireless Security Key and make sure you’ve entered the correct code in your Wireless Epson Printer.
Problem 3: Epson Printer Gets Offline
When you print something, all of sudden your Epson Printer is showing an Offline error message. This is very common issues mostly users confront on daily basis. But don’t you worry it has specific solving methods so in the blink of an eye you can bring it back Online.
Troubleshooting Techniques For Epson Printer Offline Problem
Go through the following steps to get your Epson Printer Online back from its offline mode:
- First, turn-off your Epson printer
- Now unplug and disconnect all the related USB cable.
- After a couple of minute reconnect everything then print a “Print Test Page”
- The option is available on the printer display screen.
- Check the level of ink into the cartridges and double-check the ink volume.
- This is a commonly used Epson Printer Troubleshooting trick to fix printer offline error.
Problem 4: Epson Printer Printing Blank Pages
When your printer starts printing blank pages, this makes you too much exasperating. It has easy fixes so don’t worry.
Troubleshooting Techniques For Epson Printer Prints Blank Pages
- Make sure the printer is placed on a flat surface.
- Check your ink cartridges for low/empty ink.
- Make sure you use supported stack of white plain paper for printing.
- Note:Transparent paper and Kraft paper are not supported.
- Make sure the document you try to print from Epson Printer has no blank pages.
- Make sure that the paper size, orientation, and layout in the software are set correctly.
Contact 25/7 Online Tech-Support For Additional Fixing Guide
If in case the aforementioned information doesn’t helpful for you in making any of your Epson printer Troubleshooting problems eradicated, don’t panic! We are tech-specialists who will support you in a better way. Thus, make direct connection with us through dialing 24x7 opened helpline number. Stay united until you get satisfying solution at your doorstep.
View Source:
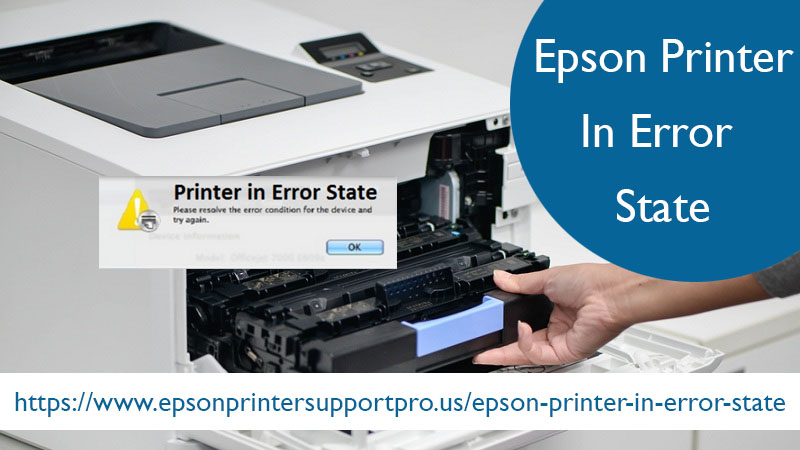
Is Your Printer In An Error State? Here Are Best Solutions!
Printer users often experience Printer in error state problems with their printer machines. This error is not limited to any one printer brand but all of them. So, if you are a regular printer user, you must learn how to fix the Epson Printer is an error state. This will not only save you time but also money as you will be able to fix your printer on your own without relying on printer services. When you receive this error message on your computer, your printer will stop working and won’t work until you fix it.
To help you with your issue, we have mentioned some of the useful troubleshooting methods below.
1. Ensure These Things First And Restart Your Devices
As soon as you find your printer is in an error state, these are the things that you need to check immediately.
- Check the connection between your printer and PC.
- Make sure all the cables connecting your printer to the PC and router are working fine.
- Check the power cord and power outlet.
After ensuring the above things, we suggest you restart your printer, computer as well as router. Switch off all these devices and leave them for a couple of minutes like that. After a couple of minutes, turn back all your devices and then check if the Printer in error state problem is fixed or not.
2. Update or Install Latest Printer Drivers
Another cause of Printer in error state issues is outdated printer drivers. If you haven’t updated the printer drivers for a while, then it’s time you do it to fix your printer issue and avoid any other errors in the future. Also, we suggest you enable the auto-update feature so that you won’t ever face any issue with your printer due to the printer drivers.
In case of incompatible or missing printer drivers, you can visit your printer website to download and install the accurate drivers. For your own convenience, you can also use any printer driver utility like Driver Easy. Driver Easy makes it easy for you to download the accurate printer drivers that are compatible with your device. When you are using Driver easy to install compatible drivers, there’s no chance to make any mistake or install the wrong set of drivers. Moreover, you can do it all in a couple of clicks and save yourself plenty of time.
Conclusion
After following the above troubleshooting methods, you should be able to fix your Epson Printer is an error state. However if due to some reason your issue persists, feel free to contact our printer experts for assistance. You can also refer to more of our self-help guides in case of any other printer error or problem.
View Source: https://epsonprintersupportpro.mystrikingly.com/blog/is-your-printer-in-an-error-state-here-are-best-solutions
How to Troubleshoot Epson Printer Communication Error?
Are you not able to print from your Epson Printer? Is it showing a Printer paused message? Or are you getting blurred or incomplete printouts while printing from your Epson printer? All of these issues arrive when your Epson printer is not able to communicate with your device. Check the below mentioned the major reasons that can cause Epson printer communication error on your device.
- Damaged power cable
- The power socket is not working
- The cable connection is loose
- You are using a wrong interface cable
- Wireless network problem
- Hardware issue
- Outdated, missing, or incompatible firmware
Before you start with the troubleshooting steps mentioned in this blog, we suggest you check a couple of things including the power outlet, connecting cables, power cord, etc.

Easy Steps to Fix Epson Printer Communication Error
Given below are the most effective solutions that you can use to Fix Epson Printer Communication Error on your own.
Fix 1: Reinstall Printer Drivers
- Enter the Control Panel in the Windows search box and then open it from the search results.
- Select Devices and Printers and then right-click on your Epson printer icon.
- Now you need to click on the Uninstall option from the menu. Doing this will remove all the printer drivers installed on your device.
- Once you have uninstalled the printer drivers from your device, visit the Epson support website to download new drivers.
- There you need to search for your printer model and select the correct operating system from the drop-down menu.
- Expand the Drivers option and then select the Download button on the right side.
- Once the drivers are downloaded, double click on the file to begin the installation.
- Follow the on-screen steps to complete the installation and then restart your PC.
Fix 2: Check the Printer Cable Connection
To check the printer cable connection, we suggest you switch off your printer as well as your computer first. Ensure that all the cables are connected properly to your printer, PC as well as a power socket. Also, check if the power socket is in working condition. You can try using another cable and plugging your printer into another socket.
Restart your printer and check if the Epson printer communication error is resolved or not.
Fix 3: Check Wireless Network Connection
- If your Epson printer is on the Network, you should confirm the TCP/IP address.
- From the control panel of your Epson printer, print a configuration page and check if there’s a duplicate IP message.
- In case you find the duplicate IP message on the configuration page, you need to update it on your computer in order to make your printer work.
- After updating your printer settings with the correct TCP/IP address, go to your printer’s control panel.
- Click on Troubleshooting and select Network Problems.
- Click on Network Diagnostics to start the network test.
- You will find the results on your printer screen, if it says to contact the administrator of the network, you need to contact your Internet Service Provider.
Fix 4: Run Windows Troubleshooter
- Most of the software issues can be fixed easily by running the Windows troubleshooter/troubleshooting. To do so, you need to open the Control Panel first and then search for the troubleshooter.
- Click on the Troubleshooting option and then select Hardware and Sound.
- Choose your printer and start the troubleshooting
- If any issue displays then resolve it and restart your device. If not issue displays, then continue to the next step.
Conclusion
After following the above fixes, your Epson printer communication error should be resolved. However, if you are still facing the same error or not able to use your Epson printer due to any other reason, then feel free to contact us for assistance. Other than that if you are facing any other issue or error with your Epson printer, then you can find the troubleshooting steps related to it on our blog page.
View Source: https://epsonprintersupportpro.mystrikingly.com/blog/epson-printer-communication-error
Is Your Epson Printer Not Printing? Looking For the Best Solutions!
Epson Printers are well-known especially for its cost-effective and high-quality printing solution. They are much reliable towards their printing function but being technical device we also cannot deny the fact that problems are most obvious to be confronted while print. One of the most common problems that mostly users have come-across when they usually print their document or photos is Epson Printer Not Printing. This can be too much infuriating for the one who actually needs printouts but his/her printer does not support to get that for no reason. In order to proficiently deal with this issue, read the blog. In this guide, we will walk you through simple solving tricks and techniques so within a pinch you can solve printer won’t print problem. Give a brief glance at once!

Reasons Why Epson Printer Not Printing
Check-out the list we have collected in the below that shows you the actual possible reasons responsible for Epson Printer Not Printing problem:
- Epson sometime refuges to print due to connectivity error.
- An outdated printer driver could also result printer not printing.
- Windows Firewall or third-party security software can trigger printer not printing problem.
- Print Spooler service is stopped running and hence causing printer won’t print problem.
Effectual Solutions To Fix Epson Printer Not Printing Problem
Some productive troubleshooting methods are mentioned underneath. So, no need to go anywhere for solution to this Epson Printer Not Printing problem. Just, glimpse of the given fixing guide and follow one-by-one until your printer get back to working mode.
Method 1: Check Your Epson Printer Connection
To print with no hassle, connection is must. So, if there is connectivity issue, you won’t print anything from your printer device. Hence, let’s check the connection first established between your printer and computer. Here is what to do:
- If you are using wireless Epson printer to print, you have to check the internet running on your PC. Make sure there is strong internet connection. Disconnect and reconnect the printer to the network, if it is required.
- Also, make sure that the printer is well-connected to the same network as your Windows system is.
- For a USB-connected printer, check the cables and make sure they are tightly inserted into the ports. Change the USB port or cable if finding any default and then try to print again to see if the problem is solved or not.
Method 2: Set Your Printer As Default
Go through the below instructions step-wise in a correct way to perfectly set your printer as default:
- Go to the Start menu on your Windows Desktop.
- Then, select Settings > Devices > Printers & scanners.
- Choose your Epson printer, go to “Manage” tab and then click “Set as default” option.
- Alternatively, uncheck the “Let Windows manage my default printer” box, to allow your PC to use the most recent printer.
If this also not solves your Printer Not Printing problem, jump to the next method.
Method 3: Check The Level Of Ink
If there is low ink or ink cartridge issue, then also Epson Printer Not Printing problem arises. Let’s follow the provided steps to get it resolved:
- Click “Start” button on your Windows PC
- Then, select Settings > Devices > Printers & scanners in the same sequence.
- Right-click on your Epson printer and then choose Printing Preferences option.
- In the Maintenance tab > click on Epson Status Monitor to check the level of ink. If the ink is low or empty, refill the genuine ink into the cartridges.
- Now, start print with your Epson Printer to see if it is printing or not.
Continue following the solving method if same problem yet persists.
Method 4: Clear All Print Jobs
If papers are stuck in the print queue, then also you can’t print from your Epson Printer. At such point of time, you should first clear all the stuck print jobs and thereafter print again to check for the issue if it has resolved or yet not. Here is what you have to perform for removing the print-jobs that are actually stuck in the printer:
- Press the Windows key + R key altogether.
- Type “services.msc” in the search box.
- Look for Print Spooler, give right-click on it and then select “Stop” option.
- Back to your Windows desktop, open “File Explorer” and, in the address bar, type: %windir%System32spoolPRINTERS.
- Delete all the files in the folder.
- Go back to the Print Spooler service > right-click on it > choose Start. Also make sure Startup type is set to Automatic and then click OK tab.
Now, your Epson Printer is ready to deliver quality printed document.
Communicate With Our Technical Team For Handy Solution
We are just hoping that at least one of these proffered solutions will help you solve the Epson Printer Not Printing problem. In case you are yet fail to get it sorted out and unfortunately none of them are helpful for you, then don’t feel bad! We are come-up with your support. Just contact us through 24/7 helpline number and stay connected with one of our talented tech-geeks. It is guarantee your problem will be eradicated in a very less period of time.
View Source: https://epsonprintersupportpro2020.wordpress.com/2021/02/02/epson-printer-not-printing-4/
What's an Epson WF-3640 error code 0x97?
The Epson printer error code 0x97 is commonly experienced by those who are using their printers for an extended period. This type of error crops up instantly, and you won’t get any warning or sign once it occurs. It compromises your printer’s fundamental functioning by disrupting a signal that helps the device to turn on and off. You won’t be able to use your printer until you permanently fix the problem.

You can see an Epson error code 0x97 on your printer’s LED screen. This error happens while you’re printing, forcing the printer to shut down unexpectedly. It mostly occurs on Epson WF-3640 (Epson 252 Ink), WF-4630 (Epson 786 Ink), or WF-7610 models in the Epson WorkForce Series.
What causes an Epson Error Code 0x97?
The Epson 0x97 error code is a type of warning whenever you encounter an internal hardware issue with your printer. It can be because of a motherboard malfunction or some other kind of internal component malfunction. Once this error appears on the screen, it’s likely because some internal components of your printer aren’t functioning correctly.
If you encounter an Epson error code 0x97 on your WF-3640 or some other WorkForce printer, don’t panic. Try following the simple troubleshooting methods below before you send your printer to a repair shop.
Troubleshooting Methods for fix Error Code 0x97:
Disconnect Everything from the Printer
Before you proceed, you need to cancel any print task and take out all paper jams from your printer. This method is relatively easy and may work for you, depending on the cause of the error. After removing all paper jams, disconnect every cable connected to the printer. They include USB cords, cable wires, and power cords, as well as ink cartridges.
Press and hold the printer’s Power button for 1 minute. Then, plug back everything, including reinstalling the Epson ink cartridges into their respective slots. Push the Power button and turn on your printer then conduct a test print. Find out if there are any changes. If the Epson 0x97 persists or if it returned after a few pages of printing, proceed to troubleshoot method 2.
- Reset your Printer
This troubleshooting technique is virtually similar to the first one. You have to disconnect all your printer’s cables. Allow your printer to rest for about five minutes before you proceed. Then, press and hold the Power button for 1 minute. Continue pressing and holding the Power button while you reconnect every cable back. You may need another person’s help with this method.
Press and hold the Power button once more for 1 minute and then release. Conduct a test print to find out if there are any improvements. If the Epson printer error code 0x97 still lingers, then the last method may be the solution.
- Clean the Print Head
There are times when a dirty and clogged printhead is the culprit behind an Epson 0x97 error. If this is the case, the solution would be to clean the printhead thoroughly. Here are the steps in cleaning an Epson printer’s printhead:
Step 1 – Remove each ink cartridge one by one from the printhead. Place the ink cartridges (in an inverted position) on top of a clean paper or towel. Then, carefully remove the printhead from the printer.
Step 2 – Wipe the bottom of the printhead thoroughly using a clean, lint-free cloth damped in warm water. Keep on cleaning the nozzle area until there’s no more black ink sticking on the fabric.
Step 3 – Soak the printhead in a bowl with warm water for 10 minutes. Do not use boiled water. Put a clean paper towel at the base and let the printhead rest above it while soaking. Take out the printhead from the bowl, and carefully wipe off any water and moisture using a dry lint-free cloth.
Step 4 – Place the printhead on top of a paper towel and allow it to air-dry for 15 minutes. Then, insert the printhead back into the carriage and reinstall all the cartridges into their respective slots. Turn on your printer and see if there are any changes.
- Install and update your printer's driver
There’s also a chance that malware is the main reason behind the Epson error code 0x97. If so, then install or update your printer’s malware protection.
Final Step in fixing an Epson Error Code 0x97
Is your Epson printer’s warranty still valid? If it still is, you can contact the customer support department to help you deal with the problem, then request customer support for possible troubleshooting methods.
If customer support can’t help you fix the issue, you can then request a replacement. The Epson printer error code 0x97 is a hardware malfunction error, which means that your printer is essentially non-operational. Epson will replace your printer if they can’t help you fix it. It would be best to take advantage of your warranty before anything else.
View Source:
https://epsonprintersupportpro2020.wordpress.com/2021/01/28/epson-printer-error-code-0x97/
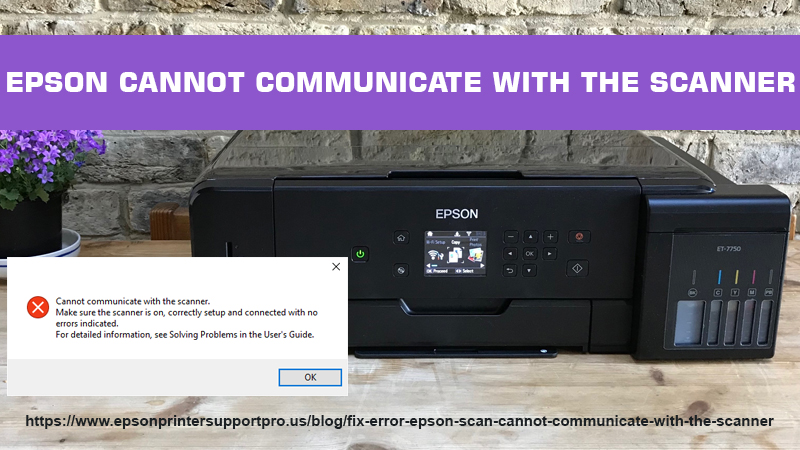
EPSON Cannot communicate with the Scanner | Resolved
Receiving Epson cannot communicate with the Scanner error message on your screen? You’ve come to the right place. Below we have mentioned all the solutions that you need to fix your Epson scanner error. In case you are in a hurry and would appreciate some help, contact our Epson support experts for remote assistance.
How To Fix EPSON Scan Cannot communicate with the scanner Error in 3 Steps?
Given below are the three solutions that work for fixing EPSON cannot communicate with the scanner error. Start with the first solutions and continue to the next until all the issues with your Epson printer are fixed.
- Update or reinstall the Epson scanner driver on your device
- Make sure you are entering the right IP address
- At last, Run Epson Scan with the admin account
Solution 1: Update Or Reinstall the Epson Scanner driver
Most of the Epson errors occur due to issues with printer drivers and as complicated as the issue seems it is not. You can fix such errors by simply updating or reinstalling the Epson drivers on your device. It can be that the drivers already installed on your device are outdated or maybe you downloaded corrupted drivers. The solution to this problem is updating and reinstalling the drivers from the Epson website. Before you go on reinstalling the drivers, try updating them and check if that fixes your issue. Only if that doesn’t work, you need to uninstall the already installed Epson scanner drivers from your device and then install them again from the Epson printer website.
If you don’t know how to install printer drivers, you can follow the below steps to install Driver Easy on your device and then let it do it all for you. Using Driver easy you can install the accurate printer drivers for your device. The tool automatically detects your system details and then installs the correct drivers on your device easily.
Now follow the steps below:
- Download Driver Easy from the web and then install it on your device.
- Once installed, launch it, and then click on the Scan Now button on your screen.
- Now Driver Easy will scan your computer for any issues with the printer drivers.
- Now the tool will show you a list of all outdated or corrupted drivers, you just need to click on the Update button in front of them. You can update all the drivers with a single click too but for that, you will need the Pro version of Driver Easy.
- Once you have updated the required drivers, you need to Restart your PC.
Try printing something from your Epson printer to check if the EPSON Cannot communicate with the scanner problem is fixed or not.
Solution 2: Use the Correct IP Address
Epson Cannot communicate with the scanner issue can also occur if you’ve entered the wrong IP address in the Epson Scanner Settings. Check whether it’s the issue and enter the correct IP address if required.
- First of all, click on Windows and E keys at the same time simultaneously, and then right-click on your Epson printer name.
- Select Properties and copy the IP address from the bottom of the screen.
- Now open Epson Scan Settings and select Delete your added scanner by clicking on the Delete option under the Network Scanner Address.
- Click on Add and then Enter Address option.
- Paste the IP Address you copied above in the given space and then hit OK>
- Now under the Epson Scanner Status option on the Epson Scan Settings window, select Test.
If Epson Cannot communicate the scanner issue persists, continue with the next solution.
Solution 3: Run Epson Scan with the Admin Account
If you have tried all the above steps and still experiencing Epson cannot communicate with the scanner issue, then this might be the solution that will fix it all. You need to run Epson Scan with the admin account rights and check if that fixes your issue.
- Go to the Epson folder and right-click on Epson Scan.
- Select Properties and then go to the Compatibility tab.
- Select the Run this program in compatibility and Run this program as an administrator option and then click on OK.
That’s all. Now you can try printing something from your printer to see if the Epson cannot communicate with the scanner issue or not.